How to Use the Document Manager in Conversations
The Document Management feature in Incorp Media LLC is designed to make your document-related tasks simpler and more organized. This feature promises to revolutionize the way you handle your contact’s documents.Following article will go into details of that.
Integrated Document Management System
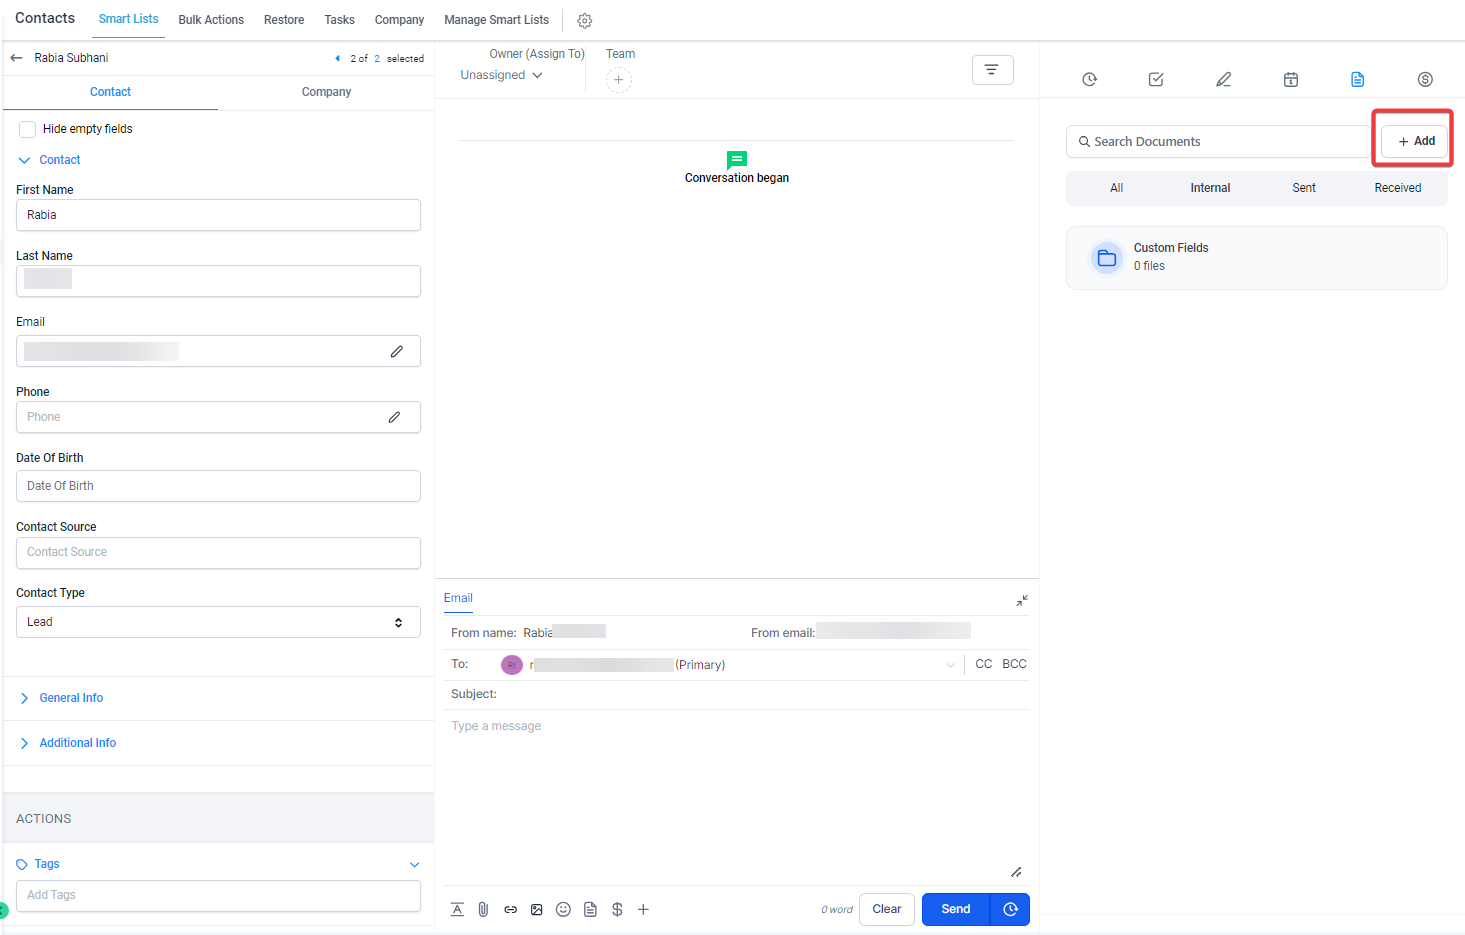
Found within the Contact Details page, the new “Documents” tab is your one-stop hub for all document tasks. Whether you’re looking to access a file, store it internally, or even send it via the client portal, it has got you covered.
Four Distinct Document Sections
- All: Forget the hassle of navigating through countless folders. Access all contact-related files effortlessly in one unified place.
- Internal: This section is dedicated to files that need to be stored internally for a specific contact. Included is a default folder named “Custom Fields.” Any files uploaded through the “File-upload” type custom field for a contact will be stored here, ensuring that everyone with access to the contact can view these documents.
- Sent : Enhance your client interactions by sending documents directly to contacts via the client portal.
- Received: Elevate your experience by receiving documents from contacts directly, all thanks to the client portal.
Adding Files Made Simple
- Uploading files to the internal section has never been easier. Whether it’s a PPT, Doc, PDF, image, or even a CSV, as long as it’s under 250 MB, you’re good to go.

Optimized Search Functionality
- Say goodbye to the endless scrolling and searching. With enhanced search functionality, finding a document by its file name is a breeze. This feature is especially optimized for the “All” section, eliminating the need to sift through folders.
How to Use Document Management within the Contact Detail View
Managing documents directly from the contact detail view enhances efficiency and organization. This feature allows you to easily view, edit, and manage documents related to specific contacts.
How to Use Document Management
- Navigate to Contacts
- Go to the Contacts section in your dashboard.
- Select the contact for whom you want to manage documents.
- Access the Document Management Feature
- In the contact detail view, look for the “Documents” option at the top right.
- Click on “Documents” to open the document management interface.
- Viewing Documents
- All Documents: View all documents sent, received, or added for this contact in the “All” view.
- Sent Documents: Click on the “Sent” tab to see all documents you have sent to the contact.
- Received Documents: Click on the “Received” tab to see all documents the contact has sent to you.
- Managing Documents
- Copy Link: Click the three dots next to a document and select “Copy Link” to copy the document’s link.
- View Source: Click “View Source” to open and edit the document in the document editor.
- Add Internal Documents: Click the “Add” button, select “Add New File,” and drag and drop or upload files relevant to the contact.
- Download Documents: Click the three dots next to a document and select “Download” to download it.
- Searching Documents
- Use the search bar to find specific documents related to the contact quickly.
- Additional Functionalities and Benefits
- Manage proposals, estimates, and contracts without needing access to the payments section.
- Team members with limited access can view and download pertinent documents from the contact section.

